Showing posts with label diecutting. Show all posts

June 13, 2020

HOW TO MAKE PEONY FLOWER | SIZZIX | VIDEO


Hello everyone! Welcome back. Today's post is not about a card but it's all about making flowers with Sizzix Peony Thinlit Dies. The card stock is from Sizzix and for the die-cutting process I used Sizzix BigShot Express Machine.

I proudly placed the flowers on my kitchen counter top. I have also a video with a step by step instructions, I hope you like it. Enjoy! :)

January 6, 2020

HAPPY NEWS | HAPPY NEW YEAR | CELEBRATING YOU CARD | PICTORIAL | SIZZIX


I wish you all a very Happy and Blessed New Year, stay blessed everyone. :)

This is the first card of the year but before getting into details I would like to start with a very sweet happy news. I've been selected as a design team memberof my very favourite blog - CASology. How I dreamt about being on their team!! My wish this year had come true. :)


This year I decided to show pictorials for each and every card/project I make. I hope I keep up  my word. Let's see!! And also I have a YouTube channel, please help me and support me by subscribing to my channel. ;) 

CARD MAKING DETAILS


These beautiful dies are from Sizzix called Freestyle Florals. I will be using the leaf die for my project today.


I ran the die and white glossy card stock several times through the Sizzix Sidekick Machine.


I went for a glossy card stock because the ink just glides on the paper and doesn't absorb and adds a rich look to the overall card design.


The ink I was talking about is this 'Camlin Brush Pens'. I love these pens because they are highly pigmented. 


I was experimenting by adding layers with colors. It's really a fun technique, just give it a try.


How funky and messy they look ;) Love it.


I adhered all the leaves side by side with Tacky glue.


I stamped the sentiment from 'Everyday Sentiments by Sizzix' with Memento Tuxedo Black ink.


I fussy cut the sentiment and foam mounted over the leaves.


To add more interest I added a few dots with a black permanent marker.

A few more shots for you here..


I hope you like the card. Thank you so much for stopping by today. See you later! :)

March 8, 2019

FOUR ORIGAMI STYLE ANIMAL CARDS | SIZZIX


Hi everyone! Welcome back! It's been a couple of weeks since I posted anything here. The reason behind my absence was we've moved to a new place. The place, the house and the environment is pretty good but I miss my mom, my hometown and my kitchen very much. It took me a week to get adjusted to this atmosphere, I was literally crying like a baby for my mom! I miss her so so much! But I made up my mind and hence here I am today :D


This was the second batch of cards I made in this new home, I already made a few for my Craftangles DT work and working on few projects for the upcoming Catherine Pooler's Release Hop. A little busy me! Anyhow, I used the newly released Origami Style Thinlit Dies from Sizzix for my projects today! 

Products Used

How I made these cards
  1. I trimmed and folded the card stock to an A2 sized card base.
  2. I blended Picked Raspberry, Spiced Marmalade, Mustard Seed and Peacock Feathers Distress Inks to the center of the card front.
  3. Then added splatters of water and same ink and let that dry.
  4. Meanwhile, I die-cut the Origami Animals out of Sizzix Card Stock with Sidekick Machine.
  5. Lastly I added the sentiment and then popped the die-cuts over the card front.
Here are few more stills for you!


The sentiments are from Catherine Pooler's Simply the Best stamp set. Entering this bunch of cards for CASology Week 334: FUNKY.


I hope you liked the cards. Thank you so much for stopping by, take care and I'll see you next time! :)

September 18, 2018

MERRY CHRISTMAS | SIZZIX LIFESTYLE


Hello my dear crafty friends! How are you all? :)

Today I have a sweet Christmas Card for you. I've used the 'cat' die-cut from Sizzix Halloween Thinlit Die Set many times now and I don't know why I am very fond of it. I'm not a cat person but this cute cat stole my heart. I wanted to use and include it in each and every make I do! Do you have any stamp or die-cut that you like the most? Please let me know in the comment section below! :D

Products from Sizzix Lifestyle


How I made this card
  • I started by die-cutting the Canson Water Color Paper with the cat from Halloween Set, gift and Christmas tree from Festive set and colored them with Distress Inks.
  • Next I placed one of the Oval Framelit die over the card stock and partially die-cut the window.
  • I distress colored the window panel with Dusty Concord Distress Ink. I added splatters of water and white paint for some snowy effect.
  • Inside the window I distressed Worn Lipstick Distress Ink.
  • And adhered all the elements with Tacky Glue.
  • Finally stamped the sentiment and finished the card off. 
And that's all for today. Thank you so much for visiting. Please visit sizzix.co.uk blog to know more details and what's happening and what's new over the blog! ;)

September 15, 2018

GUEST DESIGNER OF THE MONTH | SIZZIX LIFESTYLE


Hello everyone! I'm here with a Halloween Special for Sizzix Lifestyle. I'm the guest designer of the month and this Kid's Story Book was featured on their blog. Check the link HERE.
And here's the collage of the pages of the book. I used all their products. I hope you visit the blog and learn more about 'The Story of Silly, Sally and the Wicked Witch'. Thanks for visiting :)

December 23, 2017

COFFEE STAINED CARD | SIZZIX LIFESTYLE | VIDEO


Recently I've learned how to stain papers. I'm loving that old and vintagy look lately. So I went into my kitchen, brew some Coffee Decoction and stored into a plastic cup. It's easy to apply the decoction to your projects with a paint brush or sponge brush.


Products from Sizzix.co.uk

I applied decoction to the projects and sped up the drying process with a heat it tool. I applied second coat to the songbird die-cut for some rustic look. I actually feel that it looks like wood veneer, right?


Next I adhered the papers with Tacky Glue and popped up the die-cut with foam tape. I stamped the sentiment from Mudra in Versafine Sepia Ink and finished the card with a few golden sequins from Mudra.


And that is the card for today and I hope you like it. I have also made a video for you, Enjoy! :)

December 4, 2017

TRINKET BOX | DIY | SIZZIX LIFESTYLE


Hello hello everyone! I am so happy that we have entered the season of Love, Happiness and Kindness! Today I am here with a DIY project made using almost with scraps from my stash. It's a Trinket Box! I always wanted to make a project like this finally I am here with it. It is not perfect but I like it though! 

Products from Sizzix Lifestyle

PROJECT DETAILS

I started by cutting down the card board pieces and adhered the pattern paper from Papericious. Next I applied a coat of Egyptian Gold Pigment Paint to the edges and rubbed randomly over it.


I adhered a strip as shown above for the easy opening and closing mechanism. It wasn't that good but the over all look of the box is cool.


I die-cut the leaves from Holiday Greens, Garden Greens and Meadow Leaves out of a few scrap papers and applied a coat of gold pigment paint. I adhered all the leaves forming a wreath.


I also die-cut Angel #2 from Papericious, applied Stardust Glitter to it's wings and wrapped golden time to it's body.


I adhered the wreath over the box and followed by Angel. I foam mounted the Angel for some dimension.


Finally I embellished the Angel with a few golden gems. I hope you like it :)

PROMOTION


One of the best things about Christmas is it gives an excuse to make lots of beautiful cards! Sizzix Lifestyle would love to see what Christmas Card Creations you have come up with. So the above cards are the I made so far for Sizzix Lifestyle this year and I've shared my projects HERE. Why don't you share your projects with us? For more details please click HERE. Thank you :)

November 10, 2017

PINKY HOLIDAY CARD | SIZZIX LIFESTYLE


Do you like making Holiday Cards with non traditional colors and supplies? I enjoy doing it and I do it every year, I love playing that way! :)

Products from Sizzix Lifestyle

please visit sizzix.co.uk for more information and education about die-cutting and handmade products.

CARD PROJECT DETAILS

I like Iris card stock for some reasons because it is smooth, gives good results with the ink blending also gives a whimsical look when water or water colors were applied. When you stamp an image it does take a few seconds to dry but I think that is not a problem at all! Overall the finished card looks fantastic!! So I started by trimming down the Iris card stock to a standard sized side folding card, took another panel smaller than the main card base.


Over the smaller panel I ink blended the background with Worn Lipstick Distress Oxide Ink. After that I added splashes of water and blotted the excess water with a tissue paper. Once that's done I placed Bubble Stencil from TimHoltz's Stampers Anonymous, applied Picket Fence Dauber Ink through it.


Next, I die-cut one of the Meadow Leaves through the Big Shot Express Machine and water colored it with Peeled Paint Distress Ink.


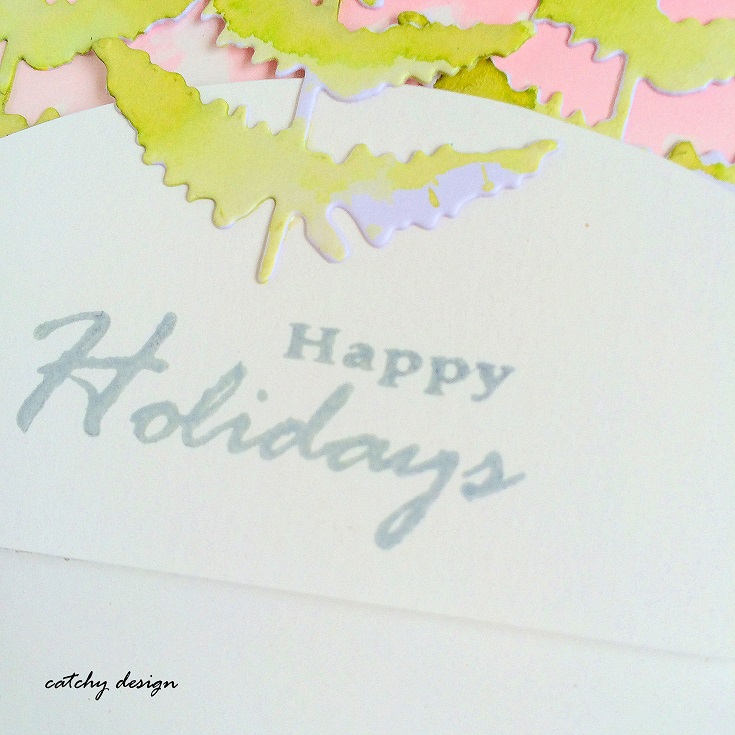
I free hand cut the hill with a pair of scissors and adhered the hill top over the smaller panel with foam tape followed by the leaves/trees with Tombow Glue.


Finally stamped the sentiment 'Happy Holidays' in London Fog ink by Memento. 


Also adhered the smaller panel over the main card base with foam tape. And that finished my card for today. Thank you for visiting. :)