Showing posts with label distress oxide inks. Show all posts

February 2, 2019

SIMPLE ONE LAYER VALENTINE'S DAY CARDS | CRAFTANGLES


Hi everyone! I'm over at Craftangles blog today with three simple Valentine's Day Cards inspired by their current challenge - Love is in the air. Kindly visit the blog and have fun playing along the challenge! :) See you soon..

November 10, 2017

PINKY HOLIDAY CARD | SIZZIX LIFESTYLE


Do you like making Holiday Cards with non traditional colors and supplies? I enjoy doing it and I do it every year, I love playing that way! :)

Products from Sizzix Lifestyle

please visit sizzix.co.uk for more information and education about die-cutting and handmade products.

CARD PROJECT DETAILS

I like Iris card stock for some reasons because it is smooth, gives good results with the ink blending also gives a whimsical look when water or water colors were applied. When you stamp an image it does take a few seconds to dry but I think that is not a problem at all! Overall the finished card looks fantastic!! So I started by trimming down the Iris card stock to a standard sized side folding card, took another panel smaller than the main card base.


Over the smaller panel I ink blended the background with Worn Lipstick Distress Oxide Ink. After that I added splashes of water and blotted the excess water with a tissue paper. Once that's done I placed Bubble Stencil from TimHoltz's Stampers Anonymous, applied Picket Fence Dauber Ink through it.


Next, I die-cut one of the Meadow Leaves through the Big Shot Express Machine and water colored it with Peeled Paint Distress Ink.


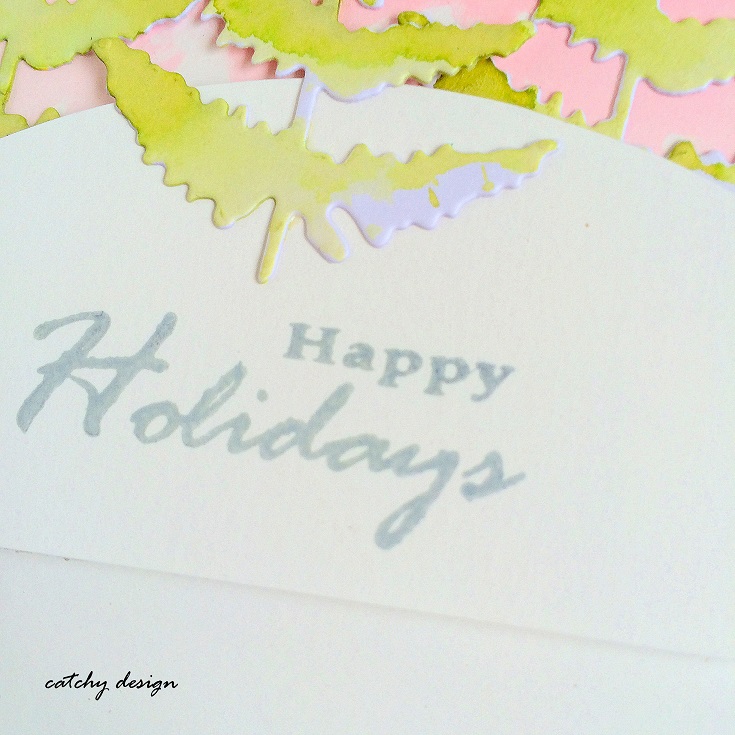
I free hand cut the hill with a pair of scissors and adhered the hill top over the smaller panel with foam tape followed by the leaves/trees with Tombow Glue.


Finally stamped the sentiment 'Happy Holidays' in London Fog ink by Memento


Also adhered the smaller panel over the main card base with foam tape. And that finished my card for today. Thank you for visiting. :)

June 6, 2017

Faux Embossed Background with die-cuts | Sizzix


This card was inspired by one of my cards made for Sizzix. You can view that post HERE. Creating a background like this is a very tedious unless you have bigger die-cuts. I used the latest Brushed Lowercase Alphabet thinlits for my project today! 


Creating a sticker sheet/die-cuts : this is very easy to make, simply adhere the double sided sticky tape on the back of your card, place the die on the front panel and run it through your Bigshot Machine. Tadaaa.. your die-cut sticker is ready!!


CARD MAKING PROCESS

Once you gathered all your supplies, adhere the die-cuts onto your card front randomly. The die-cut pieces should be of the same color as the card stock you are using!


Next I die-cut '#goals' out of white card stock and colored the bottom portion with Worn Lipstick Distress Oxide Ink and adhered onto the strip of white card stock that goes on the front panel.


Finally adhered a few sequins from Mudra and finished my card. This card is great for both men and women. It's one of a kind Unisex card ;)

VIDEO DETAILS

Here is the video for you. I hope you'll like it :) Thank you so much for visiting. See you soon!


PROMOTIONS

1. The vote is now open for Sizzix Awards any one can pick their favourite to win so please head over to the Sizzix Awards page and vote for your favourite entry.


2. You can download the free pattern papers for Father's Day here


3. As June has arrived we have a new campaign which is New Home. You can check all the details HERE


May 31, 2017

Stay Magical


I'm back to my daily routine - designing, card making, blogging, making videos, editing and etc. It's so happy to be finally in my work station. I have been missing in action but finally I am back. And just to get my mojo back I have chosen one of my older cards as inspiration and created this card. To be honest I wasn't in the mood of coloring and I don't want to color them either so I kept the castles as is. :)


CARD DETAILS

I started by ink blending the background with Cracked Pistachio Distress Oxide Ink and added splatters of water. This created a beautiful oxidized effect to the background.


Next I stamped all the castles from Mudra's Stay Magical set with Archival Jet Black Ink, fussy cut them and adhered them onto the ink blended card panel.


Just to achieve that dimensional look, I used foam tape for the front images. Before adhering the images I stamped the sentiment from the same set with Archival Jet Black Ink.


And for some shimmer I applied a nice coat of Wink of Stella clear glitter and finished it off with a few clear sequins from Mudra.


I hope you like it. Thanks for stopping by. Take care and I will see you next time :)