July 27, 2017

Nerdy Santa | Sizzix Lifestyle | Video


I don't know why but I think I'm absolutely head over heels in Christmas mood! Whenever I select a Christmas Carol as the background music for my video, my spirit just goes up! I don't know whether I will be celebrating Christmas this year or not but I am in full swing of creating Christmas Cards! The dies that I received from Sizzix Lifestyle also spoiled me! :D


I started by die-cutting the Old St. Nick Bigz Die out of White card stock by running it through the Big Shot Express Machine. And also I die-cut the glasses from Looking Dappper thinlit set out of gold glitter card stock.


I colored the Santa's beard in Memento London Fog Ink, hat in Festive Berries Distress Ink and his face with Spiced Marmalade Distress ink. You can use colored card stocks if you like but I don't have many colors so I just custom color the white card stock. I then glued everything together and adhered the Nerdy glasses too. I just love this Nerdy Santa, so cute!


Then I placed a Mini Action Wobbles behind the Santa for more nerdiness! LOL! I took a white card stock and adhered the pattern paper from Papermania over the main card base. Finally I adhered the Santa and that pretty much finishes the card.


I didn't want to add any sentiment as the card looks great without one and here you can see how he wobbles :)


Enjoy the video and thank you so much for visiting! See you soon :)

PROMOTIONS
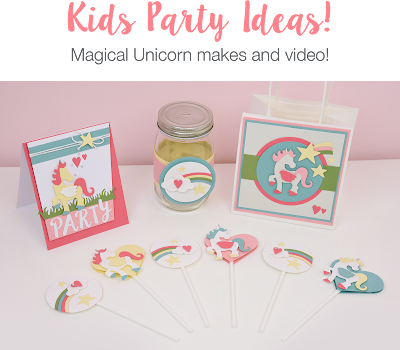
  • Are you interested in Kids Party Ideas then this page is all yours! click here
  • You can find School projects and free download papers HERE

July 24, 2017

Overlap Stamping Technique | Catherine Pooler Designs


Hello everyone! Today I have a very simple, fun and easy stamping technique called Overlap Stamping. Overlap Stamping Technique is nothing but layering of images. This is such a fun and easy technique, you don't need to mask your images at all. You can simply go with the flow! The good thing about this technique is when the colors overlap each other they automatically create another beautiful color. Such a wonderful and stress free technique :)


For my today's project, I used Yay Stripes and Butterfly Notes stamp sets from Catherine Pooler Designs. This Butterfly Notes is a part of Stamp Of Approval Lovely Notes Collection. If you know me, I like using bright and happy colors on my projects but this time I went with pastel shades.


The inks I used - It's a Girl, Sweet Sixteen, Bellini, Melon Ice, Mint To Be and Midnight Inks. All these gorgeous and lovely inks are from Catherine Pooler Designs.


I started by stamping the butterfly on a smaller panel with the inks mentioned above in a random and overlapped manner. I cleaned my stamp with a cloth in each intervals.


I love how the images overlap and creates another beautiful color. Once the stamping part was done I went ahead and added splatters of black paint with a thin paint brush. I love doing this and I strongly believe that these splatters add so much interest to the card!


Onto the main card panel I stamped the striped line from Yay Stripes stamp set in Midnight Ink. Finally I added the smaller panel over the main card base with foam tape. :)


I've also filmed a video for you where I've shared everything in detail. I hope you like it! Thank you so much for visiting. See you soon :)

July 22, 2017

Sizzix Lifestyle | Fun Cards with Under the Sea Thinlits | Video


I am just loving the process of making mass production. This time I made five cards out of one die set - Under the Sea designed by Katie Skilton. This is such an adorable set and you can literally make as many card designs as you like! :) I used Big Shot Express Machine to help die-cut the images!


I stick on to the same card design as I used on my previous Christmas Card Set. Here the chosen color palette was Blue, Grey, Yellow, Black, Red and Gold.


I thought of adhering the wave die-cuts to the background but I thought that would be too tedious to die-cut and adhere. Hence I made a stamp out of fun foam and stamped the background repeatedly with Memento London Fog Ink. You can learn how to make foam stamps with dies HERE and HERE.


The paper I used wasn't much stamping friendly and not a water color paper either! You can see the blotchy stamping and not so good water colored area. But I liked that imperfect result, I think that looks so cool! :)


I die-cut several dies out of Grey, Red, Pink, Yellow and Gold card stocks and kept them aside.


Next I took another panel smaller than the main card base and Ink Smooshed a tiny portion of the card with Chipped Sapphire Distress Ink. You can learn more about Ink Smooshing HERE.


Once the panel was dry I went ahead and stamped the sentiment from Mudra called Leaves with Archival Jet Black Ink.


And later adhered the cute Whales, See Weed, Star Fishes, Small Fishes, tiny heart and water splashes accordingly onto the panel with foam tape.


I just love the hint of gold so I managed to incorporate tiny bit of gold on my cards today. Finally I adhered all the panels together with glue and foam tape. And that pretty much finishes the cards for today :)


I've filmed a video for you where I've shared everything in detail. Enjoy!

PROMOTIONS


The winners of the giveaway was announced HERE. Kindly check this link if you are the ONE. :)


New campaign is going on for Summer Time. Katie Skilton has used her unicorn die to create kids party ideas which you can see HERE. All the makes on this have a tutorial available too. Kindly CLICK HERE for more details.

July 20, 2017

Interactive Mermaid Cards


Hello! Today I'm up on Mudra's Blog with an interactive card and a bonus card. I used Mermaid Stamp Set for my project.


Here is just a sneak peek of the project. Please visit the blog for more details. Thank you :)

July 19, 2017

Quick and Easy Christmas Cards with Catherine Pooler Designs


Making quick and simple Christmas Cards is so much fun. If you stick on to one design then it will become a lot more easier for you to mass produce the cards. Here I've followed the same sketch on all my cards but switched the colors in between.


By the way I used the products from SOA - Candy Cane Lane Collection for my projects today. Did you know the collection is available right now at catherinepooler.com ? Such a lovely collection and I encourage you to go check their site and products :)


I used Peppermint Stick Background stamp and Merry & Bright Boughs stamp sets for my cards!


CARD DETAILS

I inked up the Peppermint Background Stamp in Rockin' Red followed by Melon Ice and Aquatini and stamped onto the front of the main card base. As you can see the Melon Ice Panel is slightly brownish in color because the ink got slightly mixed with Rockin' Red. I like it when two colors mix together and give us an unexpected color! :)


I cut the panels smaller than the main card base and stamped the sentiments and images from Merry & Bright Boughs stamp set.


I like the fonts and I liked the over all design of these cards. It looks clean, fresh, modern and trendy. :) I loosely water colored the holly leaves with Lime Rickey Ink. Yes you can absolutely water color the images with these inks. You can check the video HERE.


Finally adhered the panels over the main card base with foam tape. I didn't want to add any embellishments on my cards as I wanted them to be mail friendly :)


And that's it. I hope you liked my cards and I hope you got inspired. Thank you so much for visiting!


July 16, 2017

Christmas in July? | Unboxing Newly Released Chapter 3 Dies + Chapter 2 Dies | Video


Hello my dear crafty friends! Happy Sunday to you all. Today I am going to show you the products I recently received from Sizzix Lifestyle. I love it when they send boxes, huge boxes! :D who doesn't love happy mails?? The box I received is full of awesomeness, recently released Chapter 3 dies to Chapter 2 dies! I have filmed a video for you so that you can see the close up view and get an idea about these dies. I've also made a card using one of those dies - Treetops Glisten which I will show you next! :)


So here is the list of products I received.. I will start with the newly released products :)
(I've links to all the products I'm sharing here today)

These are Bigz Dies..
They also have stamps with coordinating dies. How cool is that! And these are  Framelit dies
Other Thinlit Dies

Here is the card I made using Treetops Glisten Thinlit Dies, latest release from Chapter 3. I was inspired by one of my older cards and the technique I used is Partial Die-cutting, you can watch the video HERE


CARD DETAILS

I started by ink blending the background on main card base with Broken China Distress Ink. I didn't blend the whole background as I wanted to mimic the snowy sky. Next I partially die-cut a white card by placing Treetops Glisten and by running the sandwich through the BigShot Express Machine.


Next I adhered the die-cut panel and applied Stardust Stickles. Finally stamped the sentiment from Catherine Pooler Designs - Merry & Bright Boughs in Midnight Ink. And that's it. I hope you like it and thanks for visiting :)

July 14, 2017

Happy Card | Sizzix Lifestyle | Video


Hello everyone! This is one LONG due post and yeah! finally it's live here!! ;) I wanted the gorgeous buildings go inside the gorgeous maple leaf, that's the idea behind this card and somehow I managed to achieve it. I used Bigz Die - Leaf, Maple and latest thinlits from Timholtz Collection called Cityscape, Metropolis for my project today. I also made a card using Cityscape, Suburbia dies, you can check the blog post and video HERE.

CARD DETAILS


I had already shown a peek of this card on my Instagram feed. Well.. I will tell you how I made it! First I die-cut the Maple leaf out of white card stock and the Metropolis dies from Black Card Stock. Next I water colored the Leaf with Black Soot, Chipped Sapphire and Seedless Preserves Distress inks.


Once the leaf panel is dry I adhered the tall buildings over the leaf and trimmed off the excess. Onto the main card base, I smooshed Black Soot Distress Ink and I let it dry. Finally I adhered the leafy panel over the main card base and finished it with a sentiment panel, sentiment from Honey Bee Stamps - Happy Everything. To add more texture to the buildings I applied black glitter wash with Wink of stella.


Similarly, I've applied the same for this card also but I skipped the ink smooshing part and also used some bright colors. 


VIDEO DETAILS

I've made a video for the above card where I've shared the card making process in detail. I hope you'll like it. Thanks for visiting. See you soon :)

July 13, 2017

Cherrylana Designs | Spring Themed Cards | Video


Hello everyone! It's been a while, right? I've been concentrating on other stuff lately other than crafting and I think I should come back soon to my crafting routine! But I think taking a break is always good! But I need to film a lot of videos, fulfill my DT requirements and have lots of stuff to do :)

Today is my very first post at Cherrylana Designs, it's an introductory post with the cards. I am super happy about it. I love their stamps so much, I have many unused stamps waiting for me to get inked! :D I've made an Unboxing video of these stamps, you can check HERE.

Today I am sharing a couple of simple water color cards featuring Spring and Honey Bunny Stamp Sets. I chose Faber Castell Water Color Pencils as my water color medium. :)

TIP:

I have a small tip for you while dealing with water color pencils.


Scribbling directly onto the paper leaves harsh lines. The best solution is to pick up the pigment directly from the pencil with a paint brush. So I am applying the same technique for both the cards today. 

CARD DESIGN #1


I started by drawing a circle on a white card stock. This circle will act as a guide while stamping the images. I am not going for a full floral wreath but for a semi one! The paper I am using today isn't a water color paper, it's a regular heavy white card stock!


I stamped all the pretty flowers forming a semi circle in Archival jet Black Ink. Next I water colored the images with Faber Castell Water Color Pencils. By the way these pretty stamps are from Spring Stamp Set.


Next I stamped the sentiment from Honey Bunny in Archival Jet Black Ink. Once the panel was dry I went ahead and added tiny splatters of black paint. This will enhance the beauty of the card design.


Finally I foam mounted the floral panel onto the card front and embellished it with a few clear drops.

CARD DESIGN #2


This card design was pretty simple. I stamped all the images from Spring Stamp Set in Archival Jet Black Ink at the bottom of the card panel and water colored them using Faber Castell Water Color Pencils.


Once the panel was dry I added splatters of black paint. I love doing this splatter thing on every card. :) I think I am so obsessed with it :D


Finally stamped the sentiment from the same stamp set and foam mounted the panel onto the card front.

VIDEO DETAILS

I made a video for you for the first card where I've shared everything in detail. I hope you like it. Thank you :)