Showing posts with label copic markers. Show all posts

December 19, 2019

100% HANDMADE | MERRY CHRISTMAS CARD | VIDEO


Hello everyone! Here is my another 100% Handmade Card. I used minimal supplies and a little doodling on this card. I hope you like it. :)


CARD MAKING DETAILS
  1. I started by doodling the image followed by coloring with Copic Markers.
  2. Then fussy cut it and adhered over the Navy Blue card front.
  3. Finished the card by writing the sentiment with White Gelly Roll Pen.
VIDEO DETAILS


Here is a little video for you! Enjoy! :)

December 31, 2018

LAST MINUTE CHRISTMAS CARD IDEAS | VIDEO


Hello everyone! So this is the last post of the year 2018. I wish you all a very Happy New Year 2019. Have you made any resolutions? I have made a couple and I will share that in tomorrow's post! :D


I've made these cards a few days back and already uploaded the video on my YouTube channel. These cards are pretty simple to make. Kindly watch the video below. 


Thank you so much my dear crafty friends for your continuous support through out the years. May God Bless You All. See you soon with more crafty posts, videos and updates in the next coming year! :) 

June 1, 2018

SQUIGGLY DOODLING


Hello my dear friends! I'm a very fond of doodling. In my spare time or the times when I am depressed or stressed out I doodle a lot. I blabbered a lot about doodling HERE in the blog post. And also you can find 100% handmade cards HERE and HERE. Do check it out, it's fun!


I hand drew all the images on a white card stock, colored them with Copic Markers, fussy cut and adhered over the main card base. To the card base, I added stripes with the Copic Marker and added tiny black dots with a black permanent marker. :)


Do you like my squiggly art? I'm entering this card for CASology Week 302: SQUIGGLE, CAS-ual Fridays CFC #200 - Birthday Celebration, AAAcards CAS Game #116 - The 4th Big Birthday Bash and SSS Wednesday Challenge - Anything Goes.


March 13, 2018

COLORFUL CITYSCAPE | SIZZIX LIFESTYLE | VIDEO


Hi everyone! Do you like these colorful buildings? This funky dies are from Sizzix Lifestyle - Timholtz, Cityscape Metropolis die set. I previously made a card + video using Cityscape, Suburbia dies. You can check the card HERE.


Products from Sizzix Lifestyle


CARD MAKING DETAILS

The first step was, die-cutting all the thinlits from white card stock. I want my buildings to be colorful so I chose some colorful copic markers to color my buildings. I placed a bright yellow card stock behind the buildings and this acts as lights.


Love the background? I ink smooshed the background with Black Soot Distress Ink, added two to three layers of colors and also added splatters of black and white paint to achieve that grungy look.


I added nice coat of Wink of Stella Clear Glitter to the buildings and also added silver dots using Silver gel pen to one of the buildings (blue). Once it's dry I adhered all the buildings on the ink smooshed panel.


I die-cut the word 'hello' out of white card stock (Spring Time Set) and adhered on top of the card.


And the final step - adhering the ink smooshed panel over the main card base. That's it! :)

WATCH & ENJOY

I've also made a video for you and I hope you'll enjoy watching it! :)


For Challenges


And that's all for today. Thank you so much for visiting :)

February 12, 2018

BICYCLE | LOTS OF LOVE | SIZZIX LIFESTYLE


How cute is this Bicycle with cart full of Hearts!! I die-cut the bicycle, cart and hearts out of white card stock and colored them with Copic Markers :)


This card was made using the Chapter One dies by Sizzix Lifestyle. And the products featured here are


CARD MAKING DETAILS

I took a top folding landscape card which is a heavy weight one and I die-cut the bi-cycle from Spirng Time and Hearts from Unicorn out of white card stock. I used the same heavy weight card stock for die-cutting also.


To color the die-cuts I used Purple, Grey and Red Copics and also a black permanent marker. I adhered the cycle with tacky glue and stacked the hearts behind the cart and adhered it to the card front as well. 


I also adhered a couple of hearts as if they were coming out of the cart. I simply repeatedly stamped the sentiment from Avery Elle in Midnight ink by CP Designs. :)

I'm entering this card for the following challenges
 

I hope you like it. Thank you so much for visiting! :)

December 8, 2017

DIY HOLIDAY CARD WITH COPICS AND WATERCOLORS


I think I  am very much obsessed with these row of houses! I just love drawing these again and again. You can check my previous posts HERE and HERE. 


First, I drew all the houses with pencil and went over it with Black Permanent Marker and I erased all the lines with an eraser.


Then I colored in the houses with W5, R24 and R29 Copic Markers. Next I fussy cut it and kept it aside!


I took another panel slightly smaller than the main card base and applied a wash of blue water color from Koi Water Colors. Once it's dry, I adhered the house panel over it.


Next I added splashes of white paint from the same Koi water colors to resemble the snow. 


Next I handwritten the sentiment and applied Star Dust Stickles for some extra interest.


I hope you like my card and I hope you enjoyed watching the video. Thank you so much for visiting. Take care and I will see you next time! :)

November 21, 2017

HELLO LOVE | HERO ARTS


I have only two colors in my Copic Collection i.e., R24 (Prawn Red) and R29 (Lipstick Red). I am planning to add more, I'm saving some amount for my Copics. May be in a few months I will buy atleast two shades in each color family :)


CARD DETAILS

I took the banner stamp from Hero Arts - Baby Animals stamp set and stamped onto the smaller panel with Catherine Pooler's Midnight Ink. I copic colored the banners with R29 first and then blended the ink with R24. I just love the coloring result!! Lord! Please send me some Copic Markers!! :)


Onto some white card stock I stamped the Bunny and colored his top with the same Copic Markers, fussy cut him leaving a little white border around.


Before adhering the bunny, I stamped the sentiment from the same stamp set with CP Midnight Ink.


I wrapped white twine around the smallest panel and tied a simple bow.


I adhered the bunny onto the smallest panel and embellished with a few clear sequins. I foam mounted this panel over the smaller panel.


I applied lots of shimmer to his shirt with Wink of Stella Clear Glitter Pen. Wow! So sparkly!! 


Finally adhered the smaller panel over the main card base with some glue.


And that is the card for today and I hope you like it. I'm entering this card for A Blog Named Hero Challenge: Copy a Designer. I was inspired by Emily Midgett's cute card, you can check her card HERE.

Thank you so much for visiting. See you soon :)

May 15, 2017

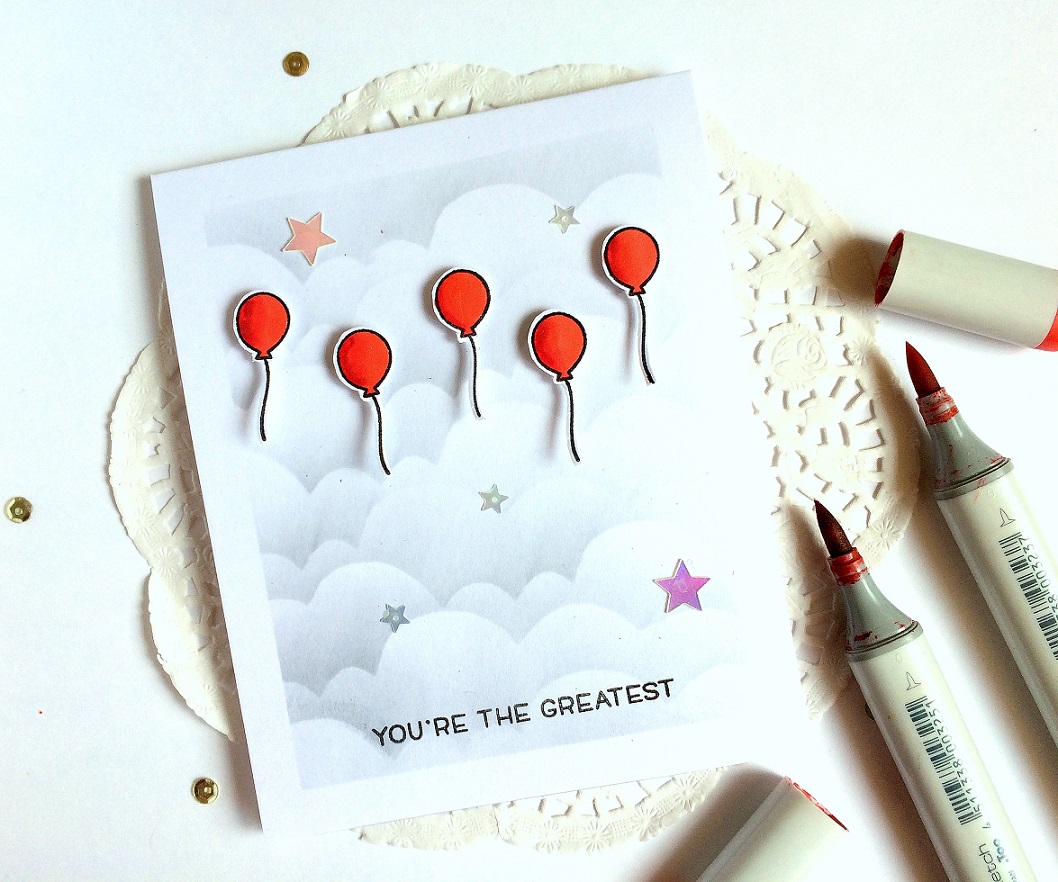
You are the greatest | Lawn Fawn


Hi everyone! I have been away from my work station for a week! Can you believe that! Me staying away from crafting!! LOL!! I've been with my family and spending quality time with them. But today I took some time to craft and made this card for Lawn Fawnatics Challenge 4 – Black, White and Bright. 


This card was inspired by one of my previous cards - HERE and you can find how I made those lovely clouds - Video HERE.


I sponged the clouds with Black Soot Distress Ink. Stamped the balloons from Year Four with CP Midnight Ink. Colored the balloons with Prawn Red | R24 and Lipstick Red | R29 Copic Markers.


Then stamped the sentiment from Pizza My Heart and adhere balloons and sequins. I hope you like it. Thanks for visiting :)