Showing posts with label sizzix floral banner thinlit dies. Show all posts

June 9, 2018

June 6, 2018

SIZZIX FLORAL BANNER THINLIT DIES BY SIZZIX LIFESTYLE


Hello everyone! Today I have another card using Sizzix Floral Banner Thinlit Die by Sizzix Lifestyle. Recently I realized one thing about me i.e., I'm clean and simple but I also love creating funky and beautiful backgrounds. So, I asked one of my good friends to define my style and the reply was 'versatile'. Yep! I'm versatile! LOL! :)

PRODUCTS FROM SIZZIX LIFESTYLE


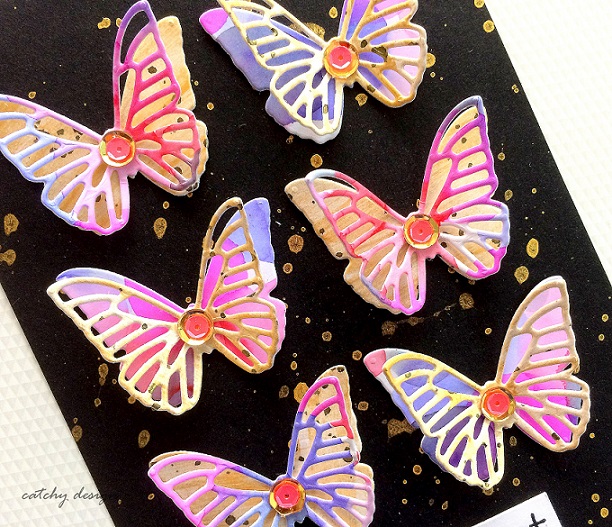
HOW I COLORED THE BUTTERFLY DIE-CUTS

  • I started by water coloring the heavy weight white panels in gold and several colors.
  • Then I placed the Butterfly thinlit dies from Floral Banners which is dual layered and die-cut the layers by running through the Big Shot Plus Machine.
  • Then I adhered the layers of the butterfly with glue.
  • To embellish more, I adhered sequins in the middle of the butterflies.


HOW I ASSEMBLED THE CARD
  • On a black card stock, I splattered some black paint.
  • Adhered the butterflies over it.
  • And finished the card with a sentiment strip from Hero Arts.


A FEW MORE SHOTS FOR YOU


I hope you like the card. Thank you so much for visiting! :)

June 4, 2018

CARDS WITH SIZZIX FLORAL BANNER THINLIT DIES


Pinterest is the place where I usually hang out a lot for my inspiration. Ever since I saw the beautiful Floral Invitations, I yearned for some floral cards like these. Finally, I was able to make a few of them! These cards feature Sizzix Floral Banner Thinlit Dies by Sizzix Lifestyle.

PRODUCTS FROM SIZZIX LIFESTYLE


HOW I COLORED THE DIE-CUTS

  • I started by water coloring the heavy weight card stock with Camlin Brush Pens.
  • Once the card stock is dry, I placed all the floral thinlit dies from Sizzix Floral Banner Thinlit Dies and ran it through the Big Shot Plus Machine.
  • The result was beautiful flowers and leaves in unexpected colors. That's the beauty of water coloring.
  • I needed a touch of gold, so I went ahead and added gold spots in the center of the flowers and leaves.
A FEW MORE SHOTS FOR YOU


I arranged a floral frame and finished the card with a sentiment from Hero Arts - Best Wishes.


I arranged the flowers at the lower portion of the card and finished the card with the same sentiment from Hero Arts.


I tried a little water coloring in a dripping fashion on this card. I arranged the florals at an edge on the top portion of the card.


And that's all for today. I hope you like my cards. I'm entering these cards for A Blog Named Hero Water Color Challenge. Thank you! :)