November 27, 2014

Christmas Card Series 2014, Day 4 - Water misting with Distress inks + Holly leaves.


Welcome to day 4 of the Christmas Card Series. I'll be showing you how to create a back ground with water misting technique using distress inks.. For more details please watch the video..


I did a little experiment with the editing, my video got a little spoiled. So lesson learnt!! Anyway enjoy! ;)

November 21, 2014

Thanks and Thanks!!


This is the second post for the day. Please click here for the Christmas Card #3 video.

I made this card for Runway Inspired Challenge #ric 72, Herve Leger. I LOVED LOVED the inspiration photo of the challenge and I found it's a bit challenging too. ;) and also entering this for 
Inkspirational Challenge #69, Shine because I've used lots of shine, glitter on my card and Little Tangles #49, Giving Thanks, I have only one stamp set 'My heart Sings' in my stash and I didn't find anything related to 'thanks' in the set, so I went with other stamps! Hope this qualifies! :)

Procedure

I hand drew the leaf first, inspired by one of the google images..


Then I water colored it with my red and orange markers..


when we mix these two colors they turn into a slight peachy pink color.. Then I sprinkled some water on to the card base and poured gold embossing powder and heat set it with heat it tool from Ranger. I did the same too on the leaf. Then I took a few embroidery threads and ruffled them and placed them behind the leaf. Before adhering the threads I stamped with My Mind's Eye stamp on the card base in Neon orange ink. Added clear stickles on the leaf for some shine! Finally added sequins here and there and stamped the sentiment from Techniqe Tuesday on the card!


And that's it! Hope you like it.
See you soon. Take care!

Christmas Card Series - Day 3, DIY Foam stamp + Ombre effect


Hello friends! Welcome to Day 3 of the Simple and fun Christmas Card Series. Today's project is a bit DIY kind of thing, like, making your own foam stamp. I don't have a regular foam in my stash so I used my glittered foam sheet which I had in my stash for quite some time! And also I've created an ombre effect using the same foam stamp. If you want to know how I created this card kindly watch the video below.
Entering this card for Beyond Grey Challenges #63 Monochromatic, I went with blues.. :)


Thank you so much for stopping by! :)

November 17, 2014

CASE-ing 100th Sketch!


Hi everyone! I'm playing along with 
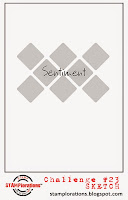
CAS(E) this Sketch #100 challenge. Yay! 100th sketch! It's really a wonderful milestone! Congratulations CTS team and you guys rock!


When I first saw this sketch, the first thing that hit my head was 'a roof top'. It's really an awesome one and I loved it. ;)


PROCEDURE

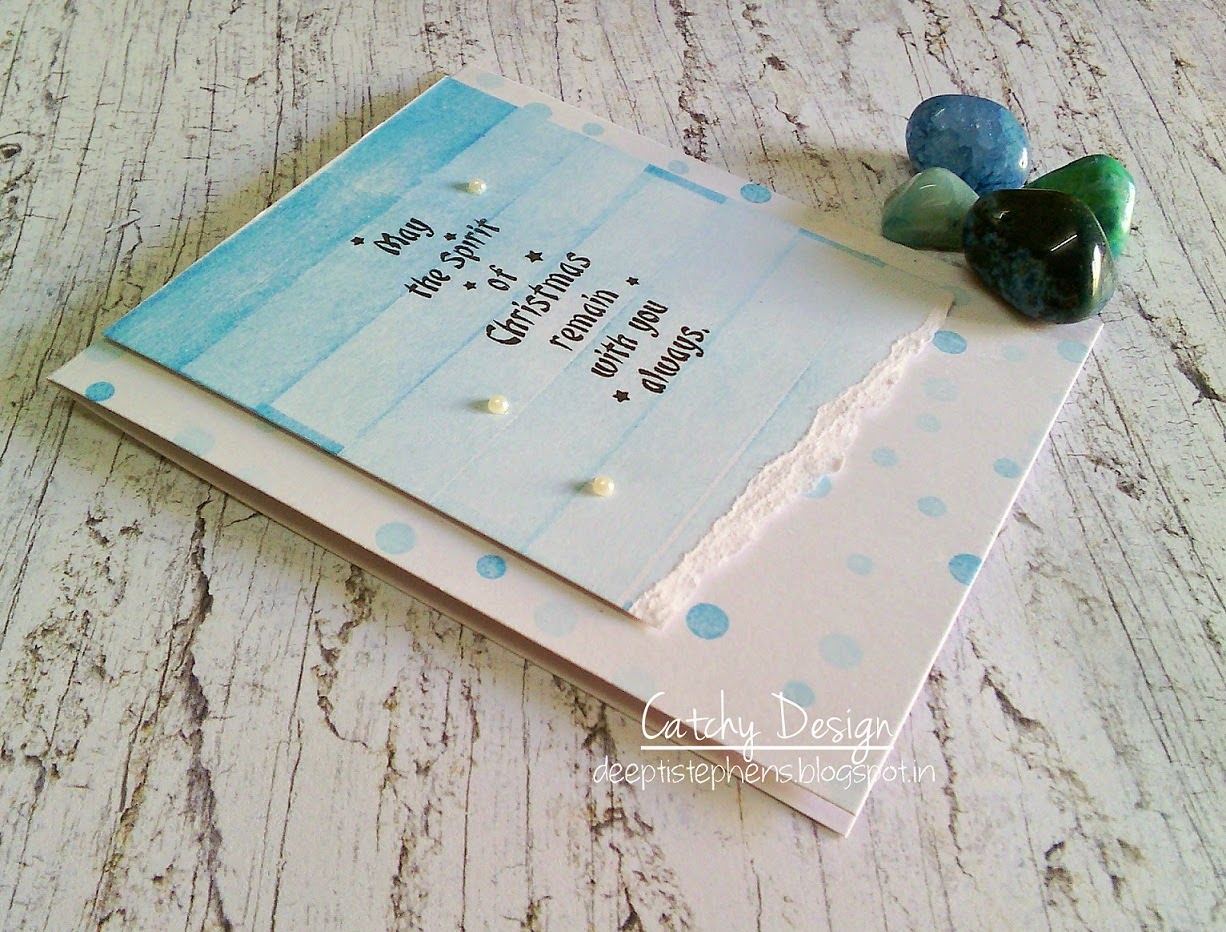
1) I took a cardstock which measure 5x4.
2) And sponged the card with Broken China distress ink.
3) Then I cut a few strips of card stock and colored them in Red Faber-castell ink and distressed with Frayed Burlap distress ink.
4) Then I took Fiskars embossing tool and embossed the strips just to give a wood grain effect/look.
5) I then adhered the strips with foam tape and white glue, in an over lapping manner.
6) And I added a chimney too at the top.
7) Then I stamped Darcie bird's stamp in Versafine black in and colored the cute little birds with Camlin Color pencils then stuck it behind the chimney.
8) Finally stamped a sentiment from Micia stamps in Versafine black ink..
9) And that's it our cute cute card was done! <3

Hope you like this card. Thank you so much for stopping by. Take care! <3

November 15, 2014

A Christmas Card!


Procedure..

1. I took a piece of card stock and misted with Vintage photo and Frayed Burlap distress inks and let it dry.

2. Once it's dry, I took Cherish adore stampset from Kaisercraft and stamped directly on to the misted paper in Vintage photo distress ink.

3. Then I took an other piece of white cardstock and hand drew leaves and colored them in Peeled paint, frayed burlap distress inks and Memento cottage ivy ink. You can find the video tutorial on leaves here 

4. And also hand drew the ornaments and colored them in Picked Raspeberry distress ink.

5. Once everything was finished i took color pencils and gave some details to the leaves and ornaments.

6. Later I took Versamark ink and rubbed on to the leaves and ornaments here and there and heat set it with gold embossing powder.

7. Finally adhered everything down on to the misted paper with glue and foam tape and golden thread.

8. Then I took this finished panel and distressed the edges with scissors and dabbed some frayed burlap distress ink to the edges.

9. Then I adhered the panel to the main card base and stamped the sentiment in Versafine ink in onyx and also added a few tiny golden pearls and clear stickles to the leaves and ornaments.

10. And that's it my card was done! ;)

I was very much inspired by Virginia's card!


That's it friends! Thank you so much for stopping by. Will drop by your blogs very soon. 
Take care.. ;)

November 14, 2014

Christmas Card Series 2014, Day 2 - Little Gang!


Hello dear friends! Welcome to day 2 of the simple and fun Christmas card series. Today I'm sharing a simple, cute and fun one layered card with masking, stamping and water coloring. I used regular card stock to water color the images,. :)


For more details please watch the video below! ;)


Thank you so much for stopping by. See you soon.. <3

November 13, 2014

Color Combo!


Hi friends! I made this card for Little Tangles #48, color combo challenge. As soon as I saw the inspiration pic I fell in love with it. I have only stamp set from Neat and Tangled, My heart sings stamp and I love it so much!


To make this card I first gave some brush kind of strokes with a sponge dauber and spice marmalade distress ink.Then flicked some water and the same distress ink color on to the back ground. Stamped a few images from the stamp set, added some embroidery floss and adhered blings. That's it my card was done!

Hope you like it. Thank you so much for stopping by.. See you!

November 7, 2014

Christmas Card Series 2014, Day 1 - Stainy Wreath


Hello friends! I'm so very excited about this new series, Christmas Cards for 2014. Yay! How about you? ;)

Today I'm sharing a stainy wreath card. I don't have too many Christmas stamps in my stash so I decided to use my regular stamps in a creative way. I strongly believe that a little can create magic sometimes.. ;) And you'll understand it in the video. ;)

I've followed the stamping technique by Jennifer McGuire, Two tone stamping technique. It's really a fun one to play and try along. And I enjoyed making this card!

So kindly watch the video for more details..


Supplies
White card stock
Kaisercraft stains stampset
Micia Peace Noel stampset
Memento Cottage Ivy
Memento Pear Tart
Faber castell red ink
Versafine black ink in onyx
White pearls

Hope you liked and enjoyed the video. Thank you so much and I will see you soon.. :)

November 5, 2014

Masculine Thanks!


Hi everyone! This is the last card of the 'thank you card series'. I made a bit masculine card and the papers I used are from Kaisercraft and Papermania collections. And the sentiment is from Bo Bunny..
I LOVE the warm colors of fall.. :)


Please watch the video for more details.. :)


Hope you like it. See you soon.. :)

November 2, 2014

Party Animal!


Hi everyone! I'm here with a very sweet card today made as my inspiration project for Lulpu. Please head over to Lulupu blog for more details.. :)


Hope you like it, thank you so much for visiting! :)